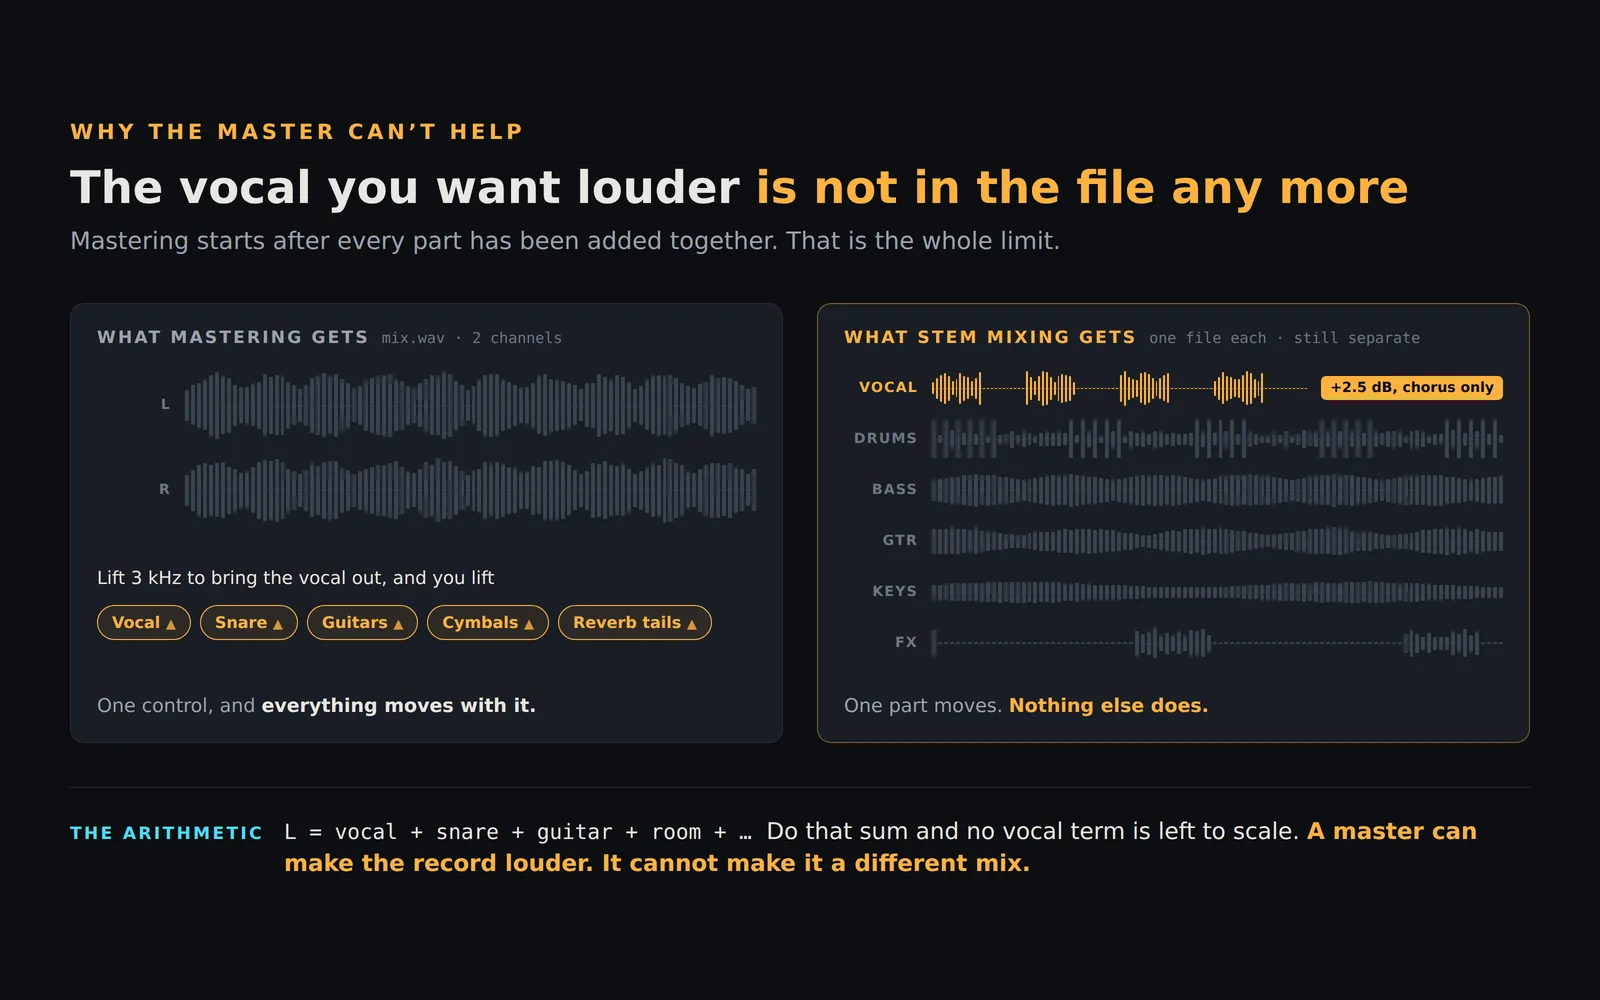
You bounce a mix. The vocal sits a bit low in the second chorus. You run it through a mastering service, it comes back louder, brighter, more finished — and the vocal still sits a bit low in the second chorus.
That is not the service being bad at its job. It is a limit built into what mastering is, and it is worth understanding before you spend money on either side of it.
Mastering happens after the mixing is already over
By the time a stereo file exists, every instrument has been summed into two channels. The vocal is not a thing in that file any more. It is arithmetic that has already been done — its samples are added into the same two streams as the guitars, the snare and the room.
A mastering process can shape that result. It can lift the top end, glue the dynamics, control the low end, raise loudness to a target. What it cannot do is reach back in and lift one part relative to the others, because there is no longer a "one part" to lift.
Turn up 3 kHz to bring out the vocal, and you turn up 3 kHz on the snare, the guitars, the cymbals and the reverb tails as well. Sometimes you get away with it. Often you trade a slightly clearer vocal for a harsher record.
This is why "fix it in the master" is a joke among engineers, and why the actual advice has always been to fix it in the mix.
What changes when the tools get your stems
Give a tool the separate tracks instead, and the arithmetic has not happened yet. The vocal is still its own thing. That makes a category of move available that a stereo file simply cannot support.
- Riding a level through the song. A vocal that sits fine in the verse and disappears in the chorus does not need a static boost — it needs to be pushed up for eight bars and left alone the rest of the time. That is one fader moving over time, and it requires the fader to still exist.
- Ducking one part under another. When the kick and the bass are fighting over the same 60–80 Hz, the fix is to move the bass down a couple of decibels for the length of each kick hit. On a stereo bounce, "the bass" and "the kick" are the same samples.
- Treating a part on its own terms. High-passing a synth pad at 200 Hz to clear space for the bass is trivial with the pad in hand and impossible afterwards.
- Placing things in the stereo field. Panning is a per-source decision. Once summed, position is baked in.
None of this is exotic. It is the ordinary work of mixing. The point is only that it has to happen while the parts are still separate, which is why a tool that takes stems can do things a tool that takes a bounce cannot — no matter how good the second one is.
Worth being clear about one thing: stem-based processing is not unique to us. Several mastering services now accept stems as well as stereo files, and mixing plugins have used analysis to suggest settings for years. The question is not whether anyone else touches stems. It is what happens after they do, and whether you can see it.
The one thing worth getting right before you start
There is a catch to working from stems, and it is the thing new users most often get wrong.
If the tool is going to treat each part on its own terms, it has to know what each part is. A kick drum and a pad want opposite treatment: one wants its transient sharpened and its tail controlled, the other wants high-passing out of the bass region and leaving alone. Get the two confused and you get a confidently wrong mix.
StemMaster works out what each track is from its file name, and the label it lands on decides where that track's level starts and which conventions it gets. The spread between labels is around six and a half decibels, so a mislabelled track is not a subtle problem — it is a track that starts several dB away from where it should.
Which means the highest-leverage thing you can do takes ten seconds:
check the labels before you press the button. A file
called Audio 03_final_v2.wav is a coin toss.
Lead Vocal.wav, Kick.wav and
Bass DI.wav are not.
If a name is ambiguous, there is a type dropdown at the top of every channel strip — set it directly and run again. And when the tool genuinely cannot tell what something is, it says so rather than guessing: unidentified tracks are flagged in amber, and they are left at the level you gave them instead of being moved to a level that assumes something untrue. That is deliberate. Guessing quietly is how you end up with a mix that is wrong in a way nobody can explain.
The problem with automated decisions you cannot see
Here is the honest difficulty with any automated mixing tool, ours included.
If a tool moves twelve faders, applies EQ to nine tracks, sets up two sidechains and decides on a compression ratio for each part, that is somewhere north of fifty decisions. If the result sounds good, you have learned nothing about why. If it sounds wrong, you have no idea which of the fifty to argue with.
That is an uncomfortable position for anyone who intends to keep getting better at this. It is also a bad position to be in commercially — you are trusting a result you cannot inspect.
So StemMaster writes down what it did. Every run produces Engine Notes in plain language. A real one, unedited:
Engine: Built-in analysis engine
Profile: Balanced
Direction: "clean modern low end, add air sparkle, synth as focal hook"
Sidechain: Drums → Bass 4 dB
Punch: Drums attack +2.7 dB
Multiband: low band(s) @ 120/3000 Hz crossovers
Soft clip: shaved 6.05 dB of transient peaks before the limiter
That is not a score out of ten or a preset name. It is the actual moves, with the actual numbers, in the order they happened. You can read it and disagree. You can read it and learn something. And when a mix comes back wrong, you have somewhere to look.
Every fader and every pan it set is also still a fader and a pan. Move them. The parts it processed are still separate parts.
How to check any of this without taking our word for it
Claims about audio software are cheap. Two things we publish so you do not have to trust ours.
The null test
StemMaster can export the individual stems as it mixed them — with the levels, pans and rides baked in. The claim is that those files sum back to exactly the mix you heard. That is checkable: load them all at unity, invert the master against the sum, and see what is left. The residual measures −142 dB, which is silence for any practical purpose.
The files are public, free, and need no signup: downloads.nomzstudios.com/stemmaster-null-test.zip
A loudness-matched comparison
The before/after on our homepage is matched to within 0.03 dB. That matters more than it sounds: a master is louder than a raw mix, and louder wins a blind comparison whether or not it is actually better. Any A/B that is not level-matched is measuring volume and calling it quality. Ours is matched, which means when you prefer the B side you are preferring the processing.
Where it runs, and what it costs
StemMaster is a Windows application. Your stems stay on your machine — the analysis engine that ships with it runs locally, is the default, and needs no account anywhere.
There is an optional AI engine you can switch on if you want a language-driven creative direction rather than a set of keywords. It uses your own API key from Anthropic or OpenAI, and it receives measurements only — loudness figures, band energy, crest factors, stereo width, and the stem file names. Your audio never leaves the machine in either mode.
One purchase, not a subscription — the current price is on the product page. The free demo is the complete application with exports disabled, so you can run your own stems through it and hear the result before deciding anything.
What it does not do
Worth saying plainly, because software that only lists its strengths is tiring to read.
It is sparing with effects. It adds reverb only to a melodic part that measures genuinely dry, never to drums or bass, and it does not add chorus. Delay is available only through the optional AI engine. If you are hoping a reverb bus will appear and glue everything together, that is not what this does — that is a creative decision it deliberately leaves to you.
It runs on Windows 10 and 11, and on macOS 15 or newer on Apple Silicon — M1 or later. Intel Macs are not supported. One licence covers both.
And it is an assistant, not a replacement. It gets you to a mixed and mastered version of your song quickly, shows you what it did, and hands you every control it touched. What it does not have is your taste, or any opinion about what the song is supposed to feel like. That part is still yours, and it should be.
If you are weighing this against a mastering subscription rather than against doing nothing, the direct version of that comparison is in what changes when you master from stems.
Try the free demo at nomzstudios.com/demo — the whole application, exports switched off.