Suno can hand you a song as separate stems instead of one stereo file. That changes what you can do with it. A stereo download is finished, for better or worse; you can make it louder, but you cannot pull the vocal forward or get the bass out of the kick's way. With stems you can. This guide covers what Suno's stems actually are, the problems almost every set has, and a workflow that turns a folder of stems into a master you would be comfortable putting on Spotify or handing to a DJ.
What Suno gives you
On the Pro and Premier plans, Auto Split separates a finished song into up to twelve stems — drums, bass, guitar, keyboards, vocals, woodwinds and so on, depending on what the song contains. It costs 50 credits. Split from Mix pulls out one instrument or the vocal and gives you that plus everything else. Advanced Split, on Premier, lets you choose from a list of close to a hundred instruments and costs 10 credits per extraction. Whichever you use, download WAV rather than MP3. Everything you do afterwards will be kinder to a file that has not already been through lossy compression.
One thing to understand before you start, because it is not what most people assume. These stems are not recordings, and they are not carved out of the finished mix either. In Suno's own words, it “listens to it and regenerates each stem from scratch” — when you extract an acoustic guitar you are getting a freshly generated guitar that matches what was there, not a slice of the original. That is why the stems behave differently from stems bounced out of a DAW session.
The problems most sets have
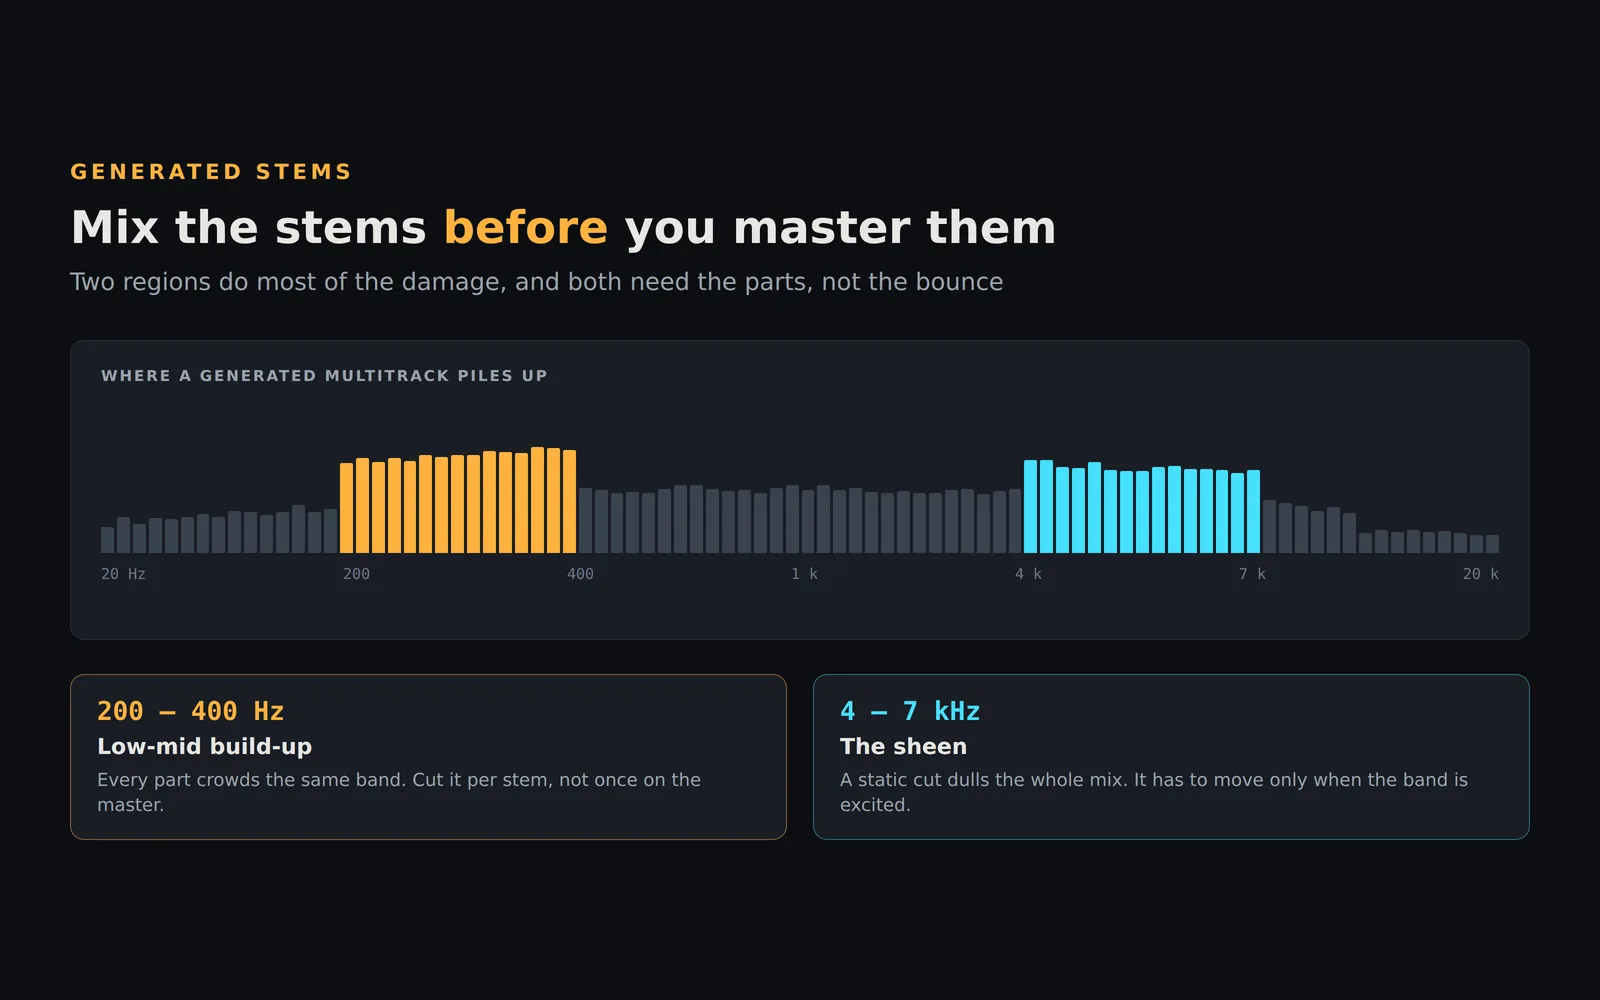
Low-mid mud. A lot of the parts pile energy into the same region around 200 to 400 Hz. Individually each stem sounds fine. Summed, the mix turns cloudy and the vocal loses its body.
The sheen. There is a fizzy, slightly plastic quality between roughly 4 and 7 kHz, most obvious on vocal consonants and cymbals. It is the sound people mean when they say a track “sounds AI”. A static EQ cut dulls the whole mix; the fix has to be dynamic, acting only when that range gets excited.
Parts that were made separately. Because each stem is regenerated rather than cut out, the set is best judged on its own terms rather than as a decomposition of the song you started with. If a part sounds different from the mix you remember, that is why. Play the stems together first and listen to what you actually have before you process anything. Where two parts crowd the same range, that is a masking problem, and there is a longer explanation in How to Reduce Spectral Masking.
Loudness. Suno's downloads are already pushed hard, so the stems arrive hot. If you simply sum them and limit, you get a master that is loud on paper and lifeless in the ear. The gain structure has to be rebuilt from the stems down before anything hits a limiter.
The workflow
Start by putting all the stems for one song in a folder and naming them by what they are: kick or drums, bass, lead vocal, backing vocals, keys, guitar, and so on. The labels matter. They tell the mixing engine which stem is the lead, which stems carry the low end, and which should be kept out of each other's way. Anything you are unsure of, label as what it mostly is.
Load the folder into StemMaster. Set the lead vocal's emphasis to Primary, which brings it forward by up to 2.5 dB on its usual level for that track type. If a pad or a rhythm part is crowding the song and should sit back, set that one to Secondary, which pushes it back by the same amount. Leave everything else on Normal.
The Direction field is a tone and character control with a published
vocabulary — words like warm, bright,
punch, clean and wide, each mapped
to a specific move you can read in the manual. It does not know where
your stems came from, so there is nothing to gain by telling it they
were generated. Use it for the character you want and let the engine
handle the balance. The low-mid and masking work described below happens
automatically, per stem, whether or not you type anything here.
Pick your loudness target. For streaming, −14 LUFS integrated with a −1 dBTP ceiling is the sane default and the Spotify loudness guide explains why. For a club or DJ context, −9 LUFS is closer to what the room expects; see the club loudness target post. Do not chase the loudness of the original Suno download. It was never meant to survive a limiter twice.
Press the button and read the Engine Notes as they fill in. On a typical set you will see the engine take a few dB out of the low mids on two or three stems rather than one big cut on the master, duck the bass under the kick with a fast release, ride the lead vocal up in the choruses word by word, and apply spectral unmasking between the vocal and whichever stem is crowding it. Each note carries the measurement that justified the move. If it did something you disagree with, change it and the master re-renders in seconds.
Then A/B. StemMaster's comparison is loudness matched, so the louder version does not automatically win. Listen for three things: whether the vocal is intelligible in the busiest section, whether the kick and bass now read as two instruments — there is a whole post on fixing kick and bass masking — and whether the 4 to 7 kHz sheen has calmed down without the cymbals going dull. If any of those is not right, that is the fader to move.
If you want to keep working in a DAW
Some people want the mix decisions but prefer to finish in their own DAW. StemMaster can export the processed stems in two modes so you can carry the balanced, treated tracks into Ableton, FL Studio, Logic or Reaper and take it from there. The details are in AI mixed my track, now I want the stems back. The advice in How to Mix Vocal Stems applies to Suno vocals too.
Why do this on your computer
Two reasons, one practical and one about ownership. The practical one is that you will do this a lot. People who make music this way make a lot of it, and a per-song or per-month service gets expensive fast; a tool you own does not care how many songs you run through it. The ownership one is that nothing leaves your machine. StemMaster's built-in analysis engine is the default and runs fully offline, with no account. The optional AI engine, if you turn it on, needs your own API key and receives measurements about the audio — never the audio itself — and it can run against a local model through Ollama. Your songs stay yours.
The short version
Download WAV stems, label them honestly, set the lead vocal to Primary, pick a sensible loudness target, and let the engine mix before it masters. Read what it did. Fix the one or two things you disagree with. Compare at matched loudness. The result is not a louder Suno download. It is a mixed and mastered song, with a written record of how it got there.